1. Cách cấu hình VEEAM Backup Free v9
- Tải bản ISO cài đặt VEEAM Backup Free v9
- Cài hệ thống VEEAM Backup Free v9 xin tham khảo:
- Cấu hình VEEAM Backup Free v9 trên 3 mô hình chính:
- Cài trên 1 VM windows 2012 R2
- Cài trên 1 Hyper-V và có windows 2008 R2/ W2K12/W2K12R2.
- Cài .Net framework 4.5, SQL Express2013 Sp1
2. Cách viết script cho VEEAM Backup trên PowerShell v2
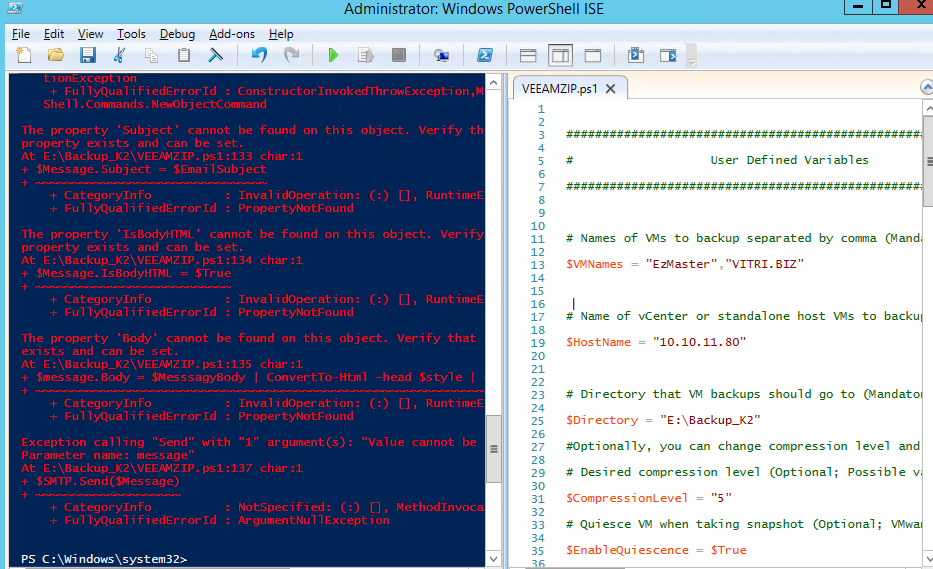
– Nội dung file VEEAMBackup.ps1 script:
##################################################################
# User Defined Variables
##################################################################
# Names of VMs to backup separated by comma (Mandatory). For instance, $VMNames = “VM1”,”VM2”
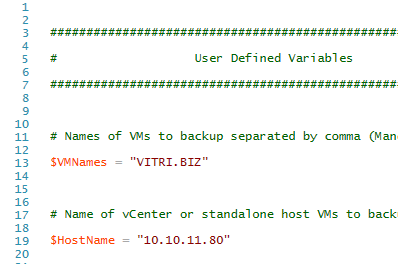
$VMNames = “VCVA60″,”bigbluebutton”
# Name of vCenter or standalone host VMs to backup reside on (Mandatory)
$HostName = “10.10.11.80”
# Directory that VM backups should go to (Mandatory; for instance, C:\Backup)
$Directory = “E:\Backup_K2”
#Optionally, you can change compression level and desired retention, disable VMware quiescence, enable encryption or even notification settings:
# Desired compression level (Optional; Possible values: 0 – None, 4 – Dedupe-friendly, 5 – Optimal, 6 – High, 9 – Extreme)
$CompressionLevel = “5”
# Quiesce VM when taking snapshot (Optional; VMware Tools or Hyper-V Integration Components are required for this in the guest OS; Possible values: $True/$False)
$EnableQuiescence = $True
# Protect resulting backup with encryption key (Optional; $True/$False)
$EnableEncryption = $False
# Encryption Key (Optional; path to a secure string)
$EncryptionKey = “”
# Retention settings (Optional; by default, VeeamZIP files are not removed and kept in the specified location for an indefinite period of time.
# Possible values: Never, Tonight, TomorrowNight, In3days, In1Week, In2Weeks, In1Month)
$Retention = “Never”
#If you like to get an email report once the backup is completed, you should additionally fill out the following notification settings.
##################################################################
# Notification Settings
##################################################################
# Enable notification (Optional)
$EnableNotification = $True
# Email SMTP server
$SMTPServer = “”
# Email FROM
$EmailFrom = “”
# Email TO
$EmailTo = “”
# Email subject
$EmailSubject = “”
##################################################################
# Email formatting
##################################################################
##################################################################
# Email formatting
##################################################################
$style = “<style>BODY{font-family: Arial; font-size: 10pt;}”
$style = $style + “TABLE{border: 1px solid black; border-collapse: collapse;}”
$style = $style + “TH{border: 1px solid black; background: #dddddd; padding: 5px; }”
$style = $style + “TD{border: 1px solid black; padding: 5px; }”
$style = $style + “</style>”
$style = $style + “TABLE{border: 1px solid black; border-collapse: collapse;}”
$style = $style + “TH{border: 1px solid black; background: #dddddd; padding: 5px; }”
$style = $style + “TD{border: 1px solid black; padding: 5px; }”
$style = $style + “</style>”
##################################################################
# End User Defined Variables
##################################################################
# End User Defined Variables
##################################################################
#################### DO NOT MODIFY PAST THIS LINE ################
Asnp VeeamPSSnapin
Asnp VeeamPSSnapin
$Server = Get-VBRServer -name $HostName
$MesssagyBody = @()
$MesssagyBody = @()
foreach ($VMName in $VMNames)
{
$VM = Find-VBRViEntity -Name $VMName -Server $Server
If ($EnableEncryption)
{
$EncryptionKey = Add-VBREncryptionKey -Password (cat $EncryptionKey | ConvertTo-SecureString)
$ZIPSession = Start-VBRZip -Entity $VM -Folder $Directory -Compression $CompressionLevel -DisableQuiesce:(!$EnableQuiescence) -AutoDelete $Retention -EncryptionKey $EncryptionKey
}
Else
{
$ZIPSession = Start-VBRZip -Entity $VM -Folder $Directory -Compression $CompressionLevel -DisableQuiesce:(!$EnableQuiescence) -AutoDelete $Retention
}
If ($EnableNotification)
{
$TaskSessions = $ZIPSession.GetTaskSessions().logger.getlog().updatedrecords
$FailedSessions = $TaskSessions | where {$_.status -eq “EWarning” -or $_.Status -eq “EFailed”}
if ($FailedSessions -ne $Null)
{
$MesssagyBody = $MesssagyBody + ($ZIPSession | Select-Object @{n=”Name”;e={($_.name).Substring(0, $_.name.LastIndexOf(“(“))}} ,@{n=”Start Time”;e={$_.CreationTime}},@{n=”End Time”;e={$_.EndTime}},Result,@{n=”Details”;e={$FailedSessions.Title}})
}
Else
{
$MesssagyBody = $MesssagyBody + ($ZIPSession | Select-Object @{n=”Name”;e={($_.name).Substring(0, $_.name.LastIndexOf(“(“))}} ,@{n=”Start Time”;e={$_.CreationTime}},@{n=”End Time”;e={$_.EndTime}},Result,@{n=”Details”;e={($TaskSessions | sort creationtime -Descending | select -first 1).Title}})
}
}
}
If ($EnableNotification)
{
$Message = New-Object System.Net.Mail.MailMessage $EmailFrom, $EmailTo
$Message.Subject = $EmailSubject
$Message.IsBodyHTML = $True
$message.Body = $MesssagyBody | ConvertTo-Html -head $style | Out-String
$SMTP = New-Object Net.Mail.SmtpClient($SMTPServer)
$SMTP.Send($Message)
}
{
$VM = Find-VBRViEntity -Name $VMName -Server $Server
If ($EnableEncryption)
{
$EncryptionKey = Add-VBREncryptionKey -Password (cat $EncryptionKey | ConvertTo-SecureString)
$ZIPSession = Start-VBRZip -Entity $VM -Folder $Directory -Compression $CompressionLevel -DisableQuiesce:(!$EnableQuiescence) -AutoDelete $Retention -EncryptionKey $EncryptionKey
}
Else
{
$ZIPSession = Start-VBRZip -Entity $VM -Folder $Directory -Compression $CompressionLevel -DisableQuiesce:(!$EnableQuiescence) -AutoDelete $Retention
}
If ($EnableNotification)
{
$TaskSessions = $ZIPSession.GetTaskSessions().logger.getlog().updatedrecords
$FailedSessions = $TaskSessions | where {$_.status -eq “EWarning” -or $_.Status -eq “EFailed”}
if ($FailedSessions -ne $Null)
{
$MesssagyBody = $MesssagyBody + ($ZIPSession | Select-Object @{n=”Name”;e={($_.name).Substring(0, $_.name.LastIndexOf(“(“))}} ,@{n=”Start Time”;e={$_.CreationTime}},@{n=”End Time”;e={$_.EndTime}},Result,@{n=”Details”;e={$FailedSessions.Title}})
}
Else
{
$MesssagyBody = $MesssagyBody + ($ZIPSession | Select-Object @{n=”Name”;e={($_.name).Substring(0, $_.name.LastIndexOf(“(“))}} ,@{n=”Start Time”;e={$_.CreationTime}},@{n=”End Time”;e={$_.EndTime}},Result,@{n=”Details”;e={($TaskSessions | sort creationtime -Descending | select -first 1).Title}})
}
}
}
If ($EnableNotification)
{
$Message = New-Object System.Net.Mail.MailMessage $EmailFrom, $EmailTo
$Message.Subject = $EmailSubject
$Message.IsBodyHTML = $True
$message.Body = $MesssagyBody | ConvertTo-Html -head $style | Out-String
$SMTP = New-Object Net.Mail.SmtpClient($SMTPServer)
$SMTP.Send($Message)
}
– Cấu hình PowerShell V2 cho phép chạy, read/write/executive trên máy chủ Windows chạy bản VEEAM Backup Free v9.
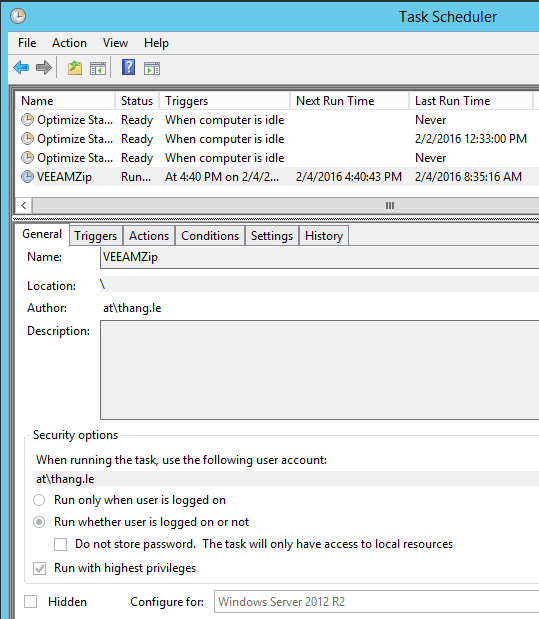
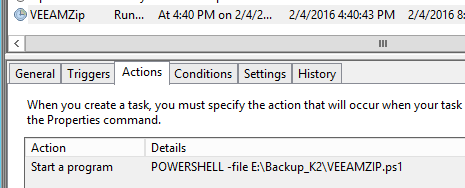
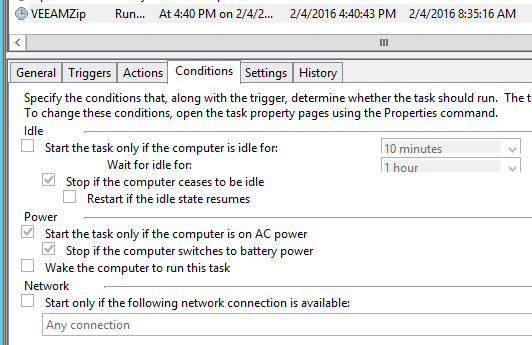
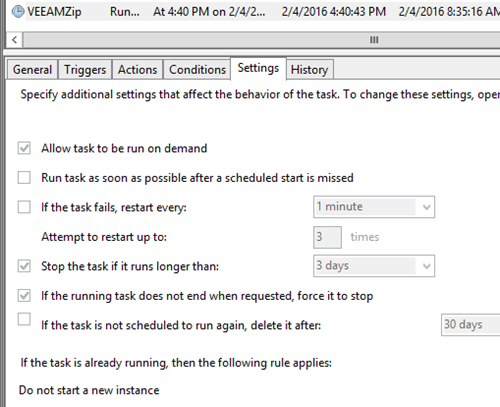
– Cấu hình Task Schedule trên Windows > Administrator Tool cho phép chạy Script theo lịch trình thời gian (onTime, on daily, on weekly, on Monthly…)
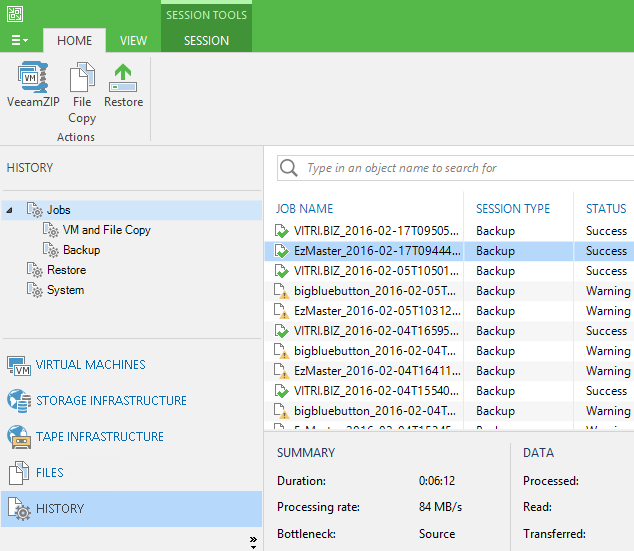
– Kiểm tra history kết quả backup của VEEAM Backup Free v9
3. Các tình huống thực hành:
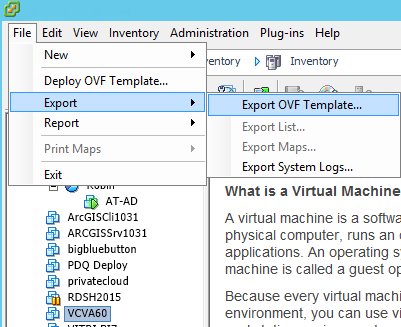
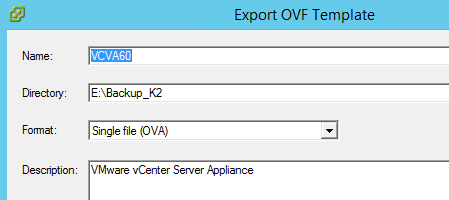
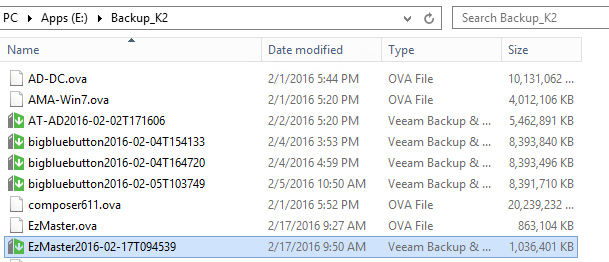
3.1. Backup VM thông qua vSphere Client gói OVA/OVF
3.2. Backup VM thông qua Script chạy trên PowerShell v2
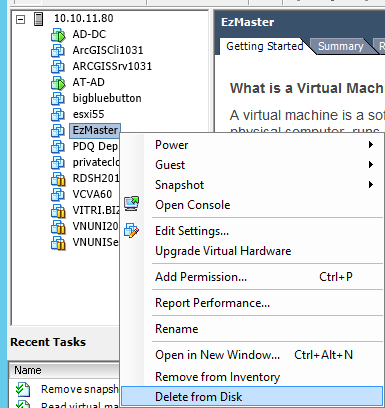
3.3. Xóa máy ảo trên vSphere 6 sau khi đã backup bằng 2 cách trên
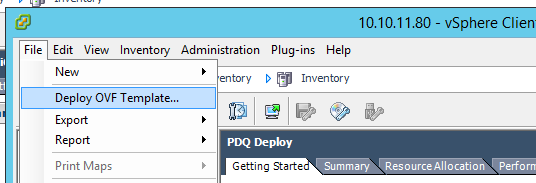
3.4. Khôi phục lại VM bằng vSphere Client > Deployment OVA/OVF
3.5. Bật VM chạy thử nghiệm kiểm tra tình trạng VM
– Nếu chạy ổn định chuyển tiếp sang bước 3.6.
– Nếu không ổn phải chạy lại các bước
3.6. Sau khi chạy thử nghiệm VM chạy ổn định, ta xóa VM đó lần 2.
3.7. Chạy khôi phục lại VM bằng VEEAM Backup Free v9
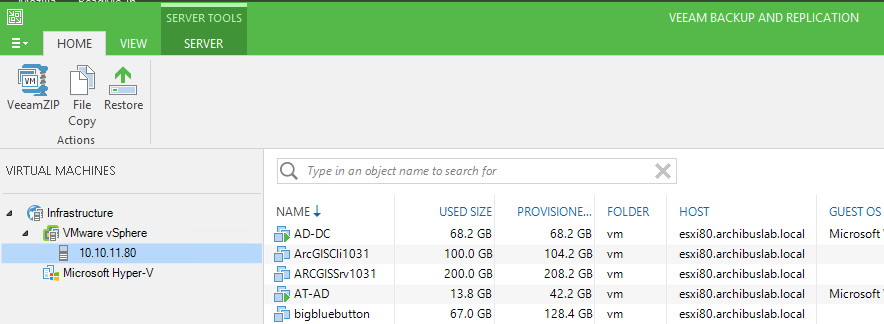
– Mở VEEAM backup Free v9
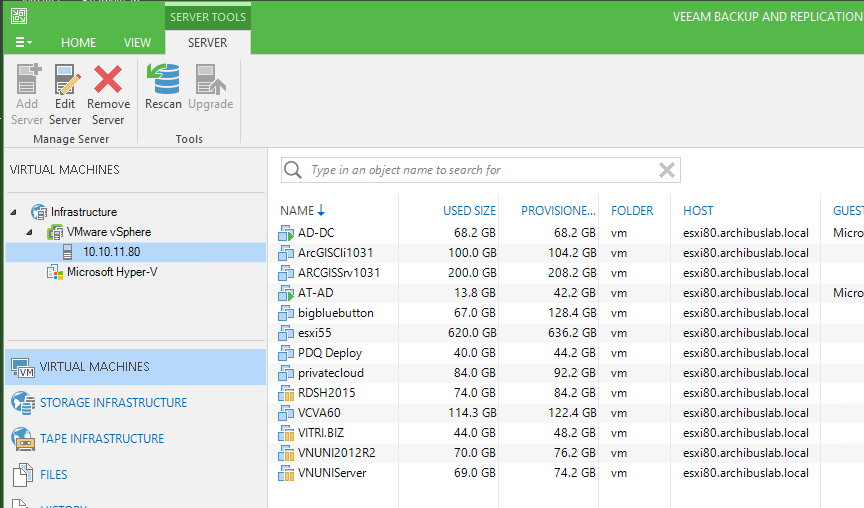
– Chọn menu: SERVER > VMware vSphere > IP host / Name server ESXi host để kiểm tra xem VM có còn không ?
– Chọn chuyển sang Menu: HOME
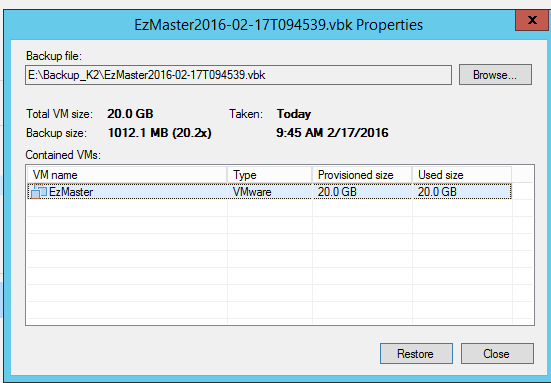
Bấm nút Restore > chọn File đã backup để restore
Sau khi VEEAM backup phân tích được file backup sẽ có thông tin chi tiết VM cần restore
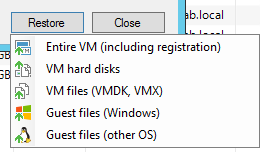
Chọn nút Restore và bấm Popup menu: Entire VM (include registration)
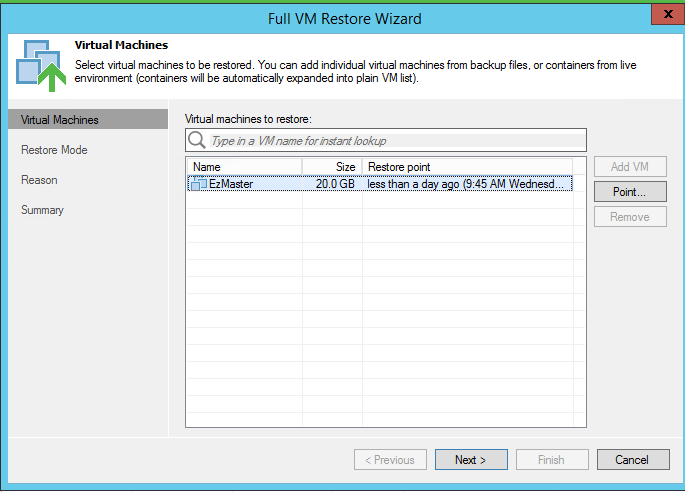
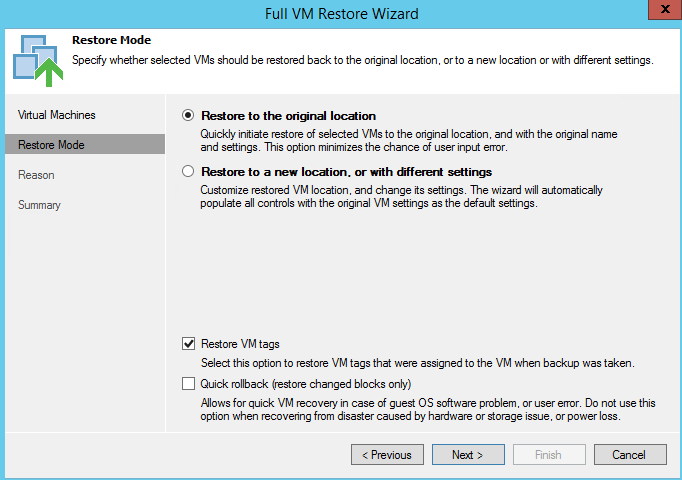
Màn thông tin vị trí khôi phục lại VM
Chọn vị trí khôi phục là nguyên bản (như cũ) hoặc chọn vị trí máy chủ khác để khôi phục:
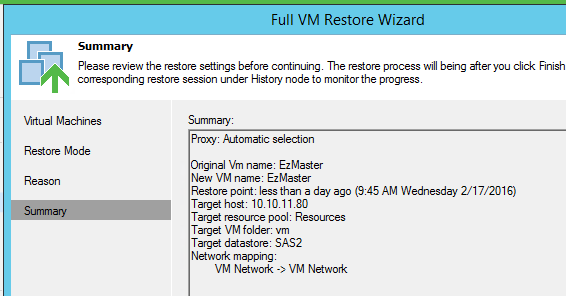
Nhập lý do khôi phục
Bấm Finish để bắt đầu khôi phục lại VM
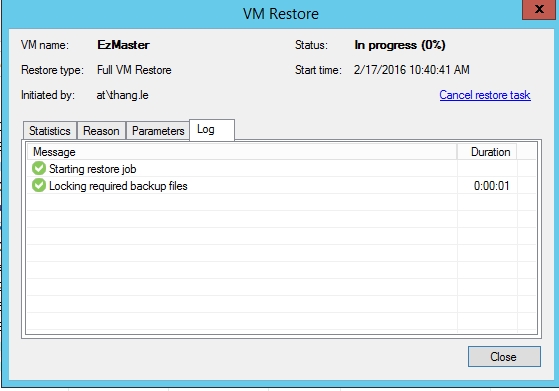
Màn tiến trính khôi phục bắt đầu thực hiện
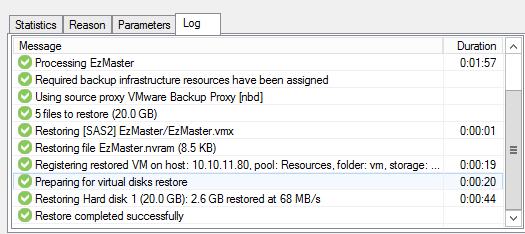
Kết quả hoàn thành việc khôi phục VM bằng VEEAM Backup Free v9
Kiểm tra tình trạng máy VM trên vShere client sau khi đã khôi phục thành công.
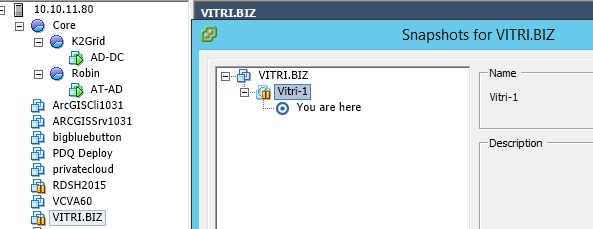
3.8.Tình huống backup và Restore VM đã được snapshot
– Sửa lại màn powerShell script
– Cho chạy script
– Sau khi chạy kết quả VM có snapshot được backup
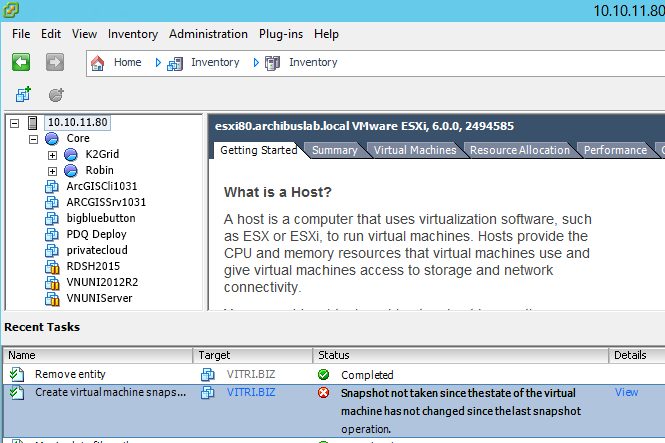
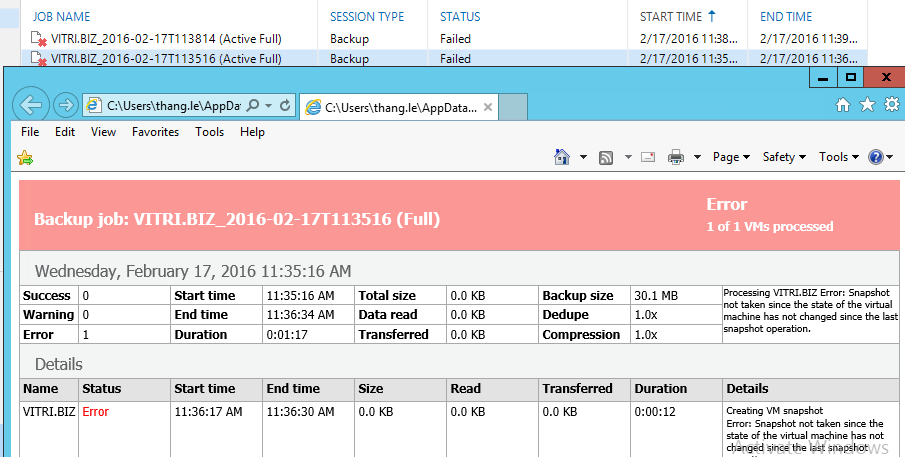
Đến khoảng thời gian ngắn sau thì thấy ngừng chạy script, trên màn vsphere cleint báo lỗi VM có snapshot
“Snapshot not taken since the state of the virtual machine has not changed since the last snapshot operation.”
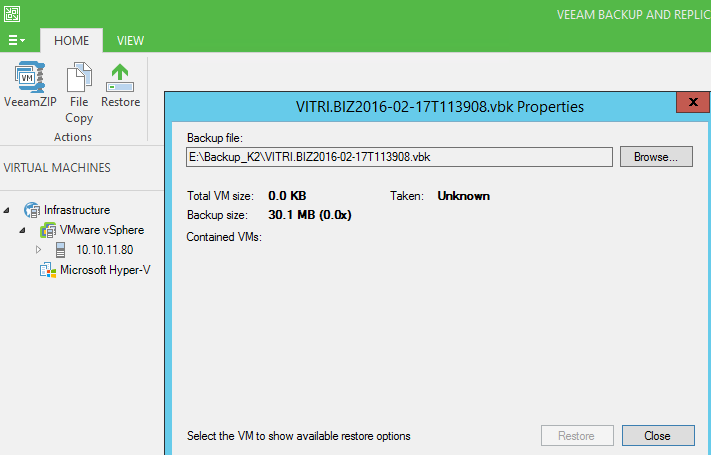
– Mở lại VEEAM Backup Free v9 để khôi phục VM có snapshot (đã xóa VM trên Host 10.10.11.80)
– Thực hiện lại tiến trình restore VM đã snapshot không thành công.
Kết luận:
– Những máy ảo nào đã được snapshot bằng vSphere VMware thì không thể backup bằng VEEAM Backup Free v9 thông qua Script PowerShell.
Muốn thực hiện backup/restore thành công các VM này phải Consolidate trước, sau đó delete all hết các bản Snapshot trước khi chạy Script powershell backup.
– Bản chất của quá trình backup của VEEAM Backup Free là có dùng cơ chế snapshot các VM, nên khi hệ thống VB đang vận hành cơ chế snapshot các máy ảo bạn đừng consolidate hay xóa các bản snapshot của VB, nó sẽ gây lỗi quá trình backup replicate
Chúc các bạn thành công trong công tác bảo vệ toàn vẹn và an toàn dữ liệu, máy ảo bằng VEEAM Backup v9 !
nguồn: https://thangletoan.wordpress.com/2016/02/17/cch-dng-veeam-backup-v9/
http://www.slideshare.net/laonap166/cch-dng-veeam-backup-v9







0 comments:
Post a Comment