Installing Zabbix Agent
Follow the below instructions to install Zabbix Agent on CentOS, RHEL 7/6/5 systems.
Step 1: Add Required Repository
Before installing Zabbix Agent first configure zabbix yum repository using following commands as per your required version and operating system.
CentOS/RHEL 7:
# rpm -Uvh http://repo.zabbix.com/zabbix/2.2/rhel/7/x86_64/zabbix-release-2.2-1.el7.noarch.rpm

CentOS/RHEL 6:
# rpm -Uvh http://repo.zabbix.com/zabbix/2.2/rhel/6/x86_64/zabbix-release-2.2-1.el6.noarch.rpm

CentOS/RHEL 5:
# rpm -Uvh http://repo.zabbix.com/zabbix/2.2/rhel/5/x86_64/zabbix-release-2.2-1.el5.noarch.rpm
Step 2: Install Zabbix Agent
After installing yum repository packages in our system. Now use following command to install Zabbix agent on your Linux sytem.
# yum installzabbix zabbix-agent
Step 3: Update Zabbix Agent Configuration
As zabbix agent has been successfully installed on our remote system. Now we just need to configure zabbix agent by adding zabbix server ip in its configuration file /etc/zabbix/zabbix_agentd.conf
#Server=[zabbix server ip]
#Hostname=[ Hostname of client system ]

Server=192.168.1.11
Hostname=Server1
Step 4: Restarting Zabbix Agent
After adding zabbix server ip in configuration file, now restart agent service using below command.
# /etc/init.d/zabbix-agent restart
To start and stop zabbix-agent service anytime use following commands.
# /etc/init.d/zabbix-agent start
# /etc/init.d/zabbix-agent stop
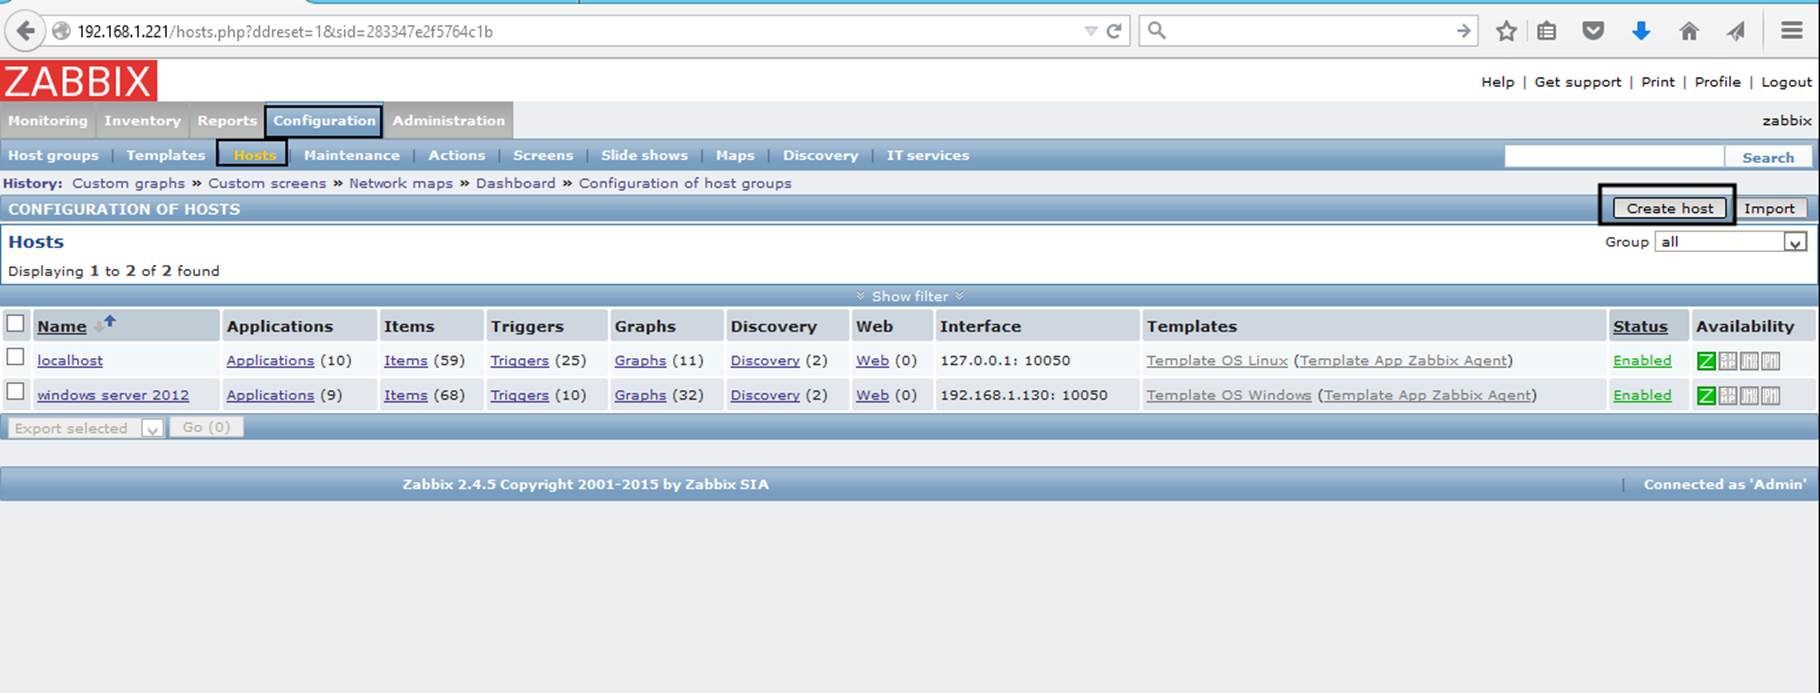
Step 5: Add Zabbix Agent Monitored Host to Zabbix Server
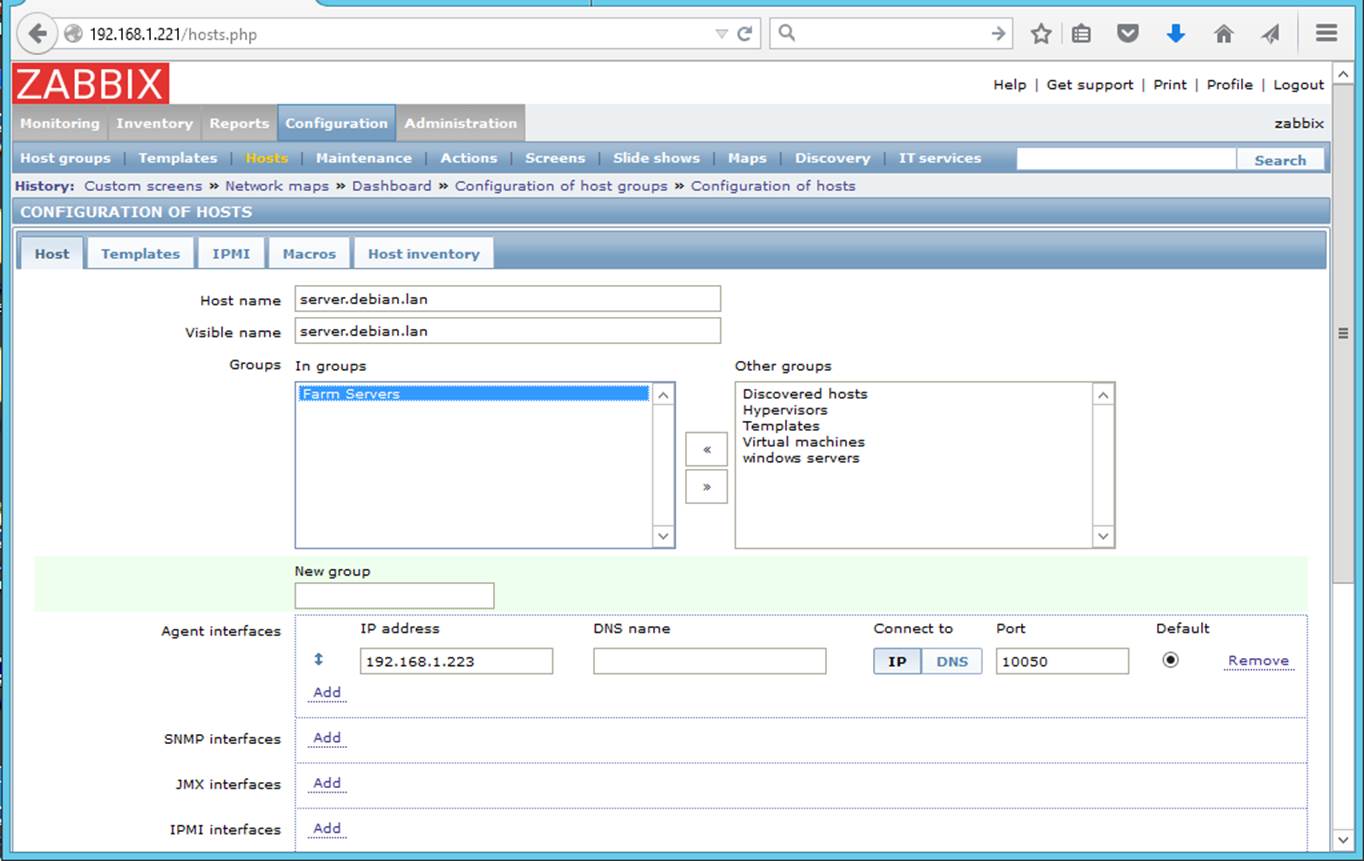
6. On the next step it’s time to move to Zabbix server web console and start adding the hosts which run zabbix agent in order to be monitored by the server.Go to Configuration -> Hosts -> Create Host -> Host tab and fill the Host name field with the FQDN of the monitored zabbix agent machine, use the same value as above for Visible name field.Next, add this host to a group of monitored servers and use the IP Address of the monitored machine at Agent interfaces field – alternatively you can also use DNS resolution if it’s the case. Use the below screenshots as a guide.
Add Linux Host to Zabbix Monitoring
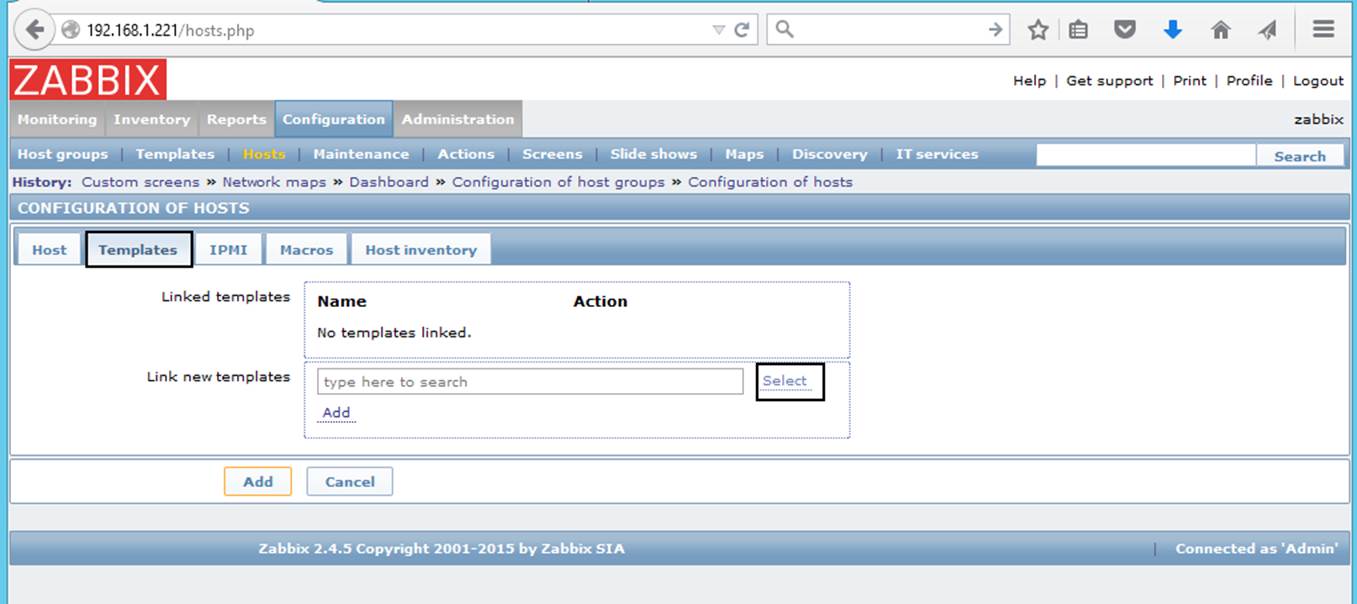
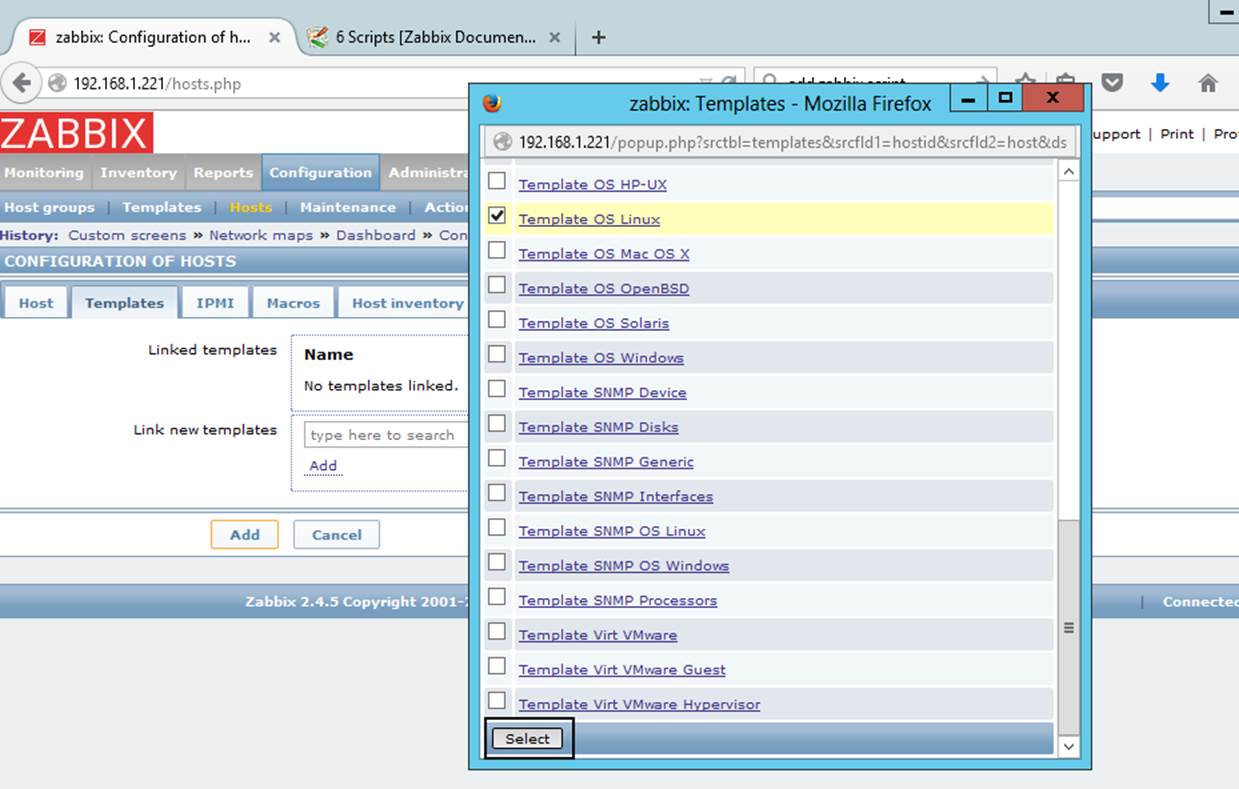
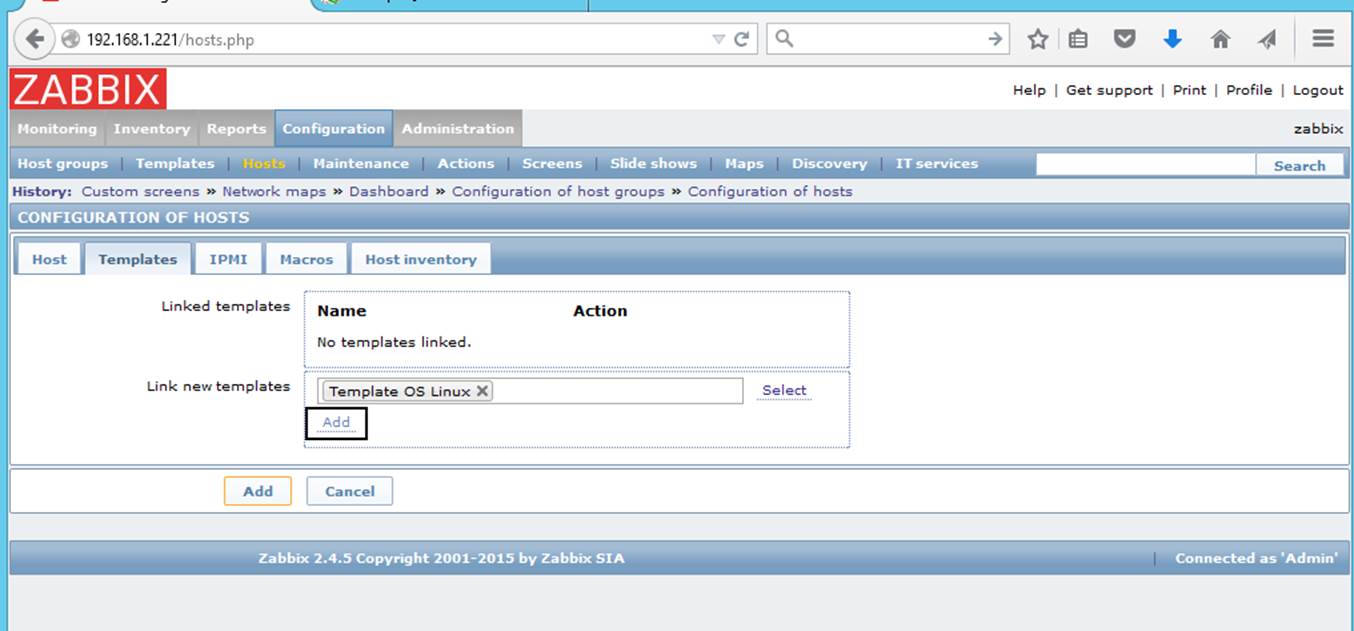
Add Linux Host to Zabbix Host Group7. Next, move to Templates tab and hit Select. A new window with templates should open. ChooseTemplate OS Linux then scroll down and hit on Select button to add it and automatically close the window.
Add Zabbix Linux OS Template
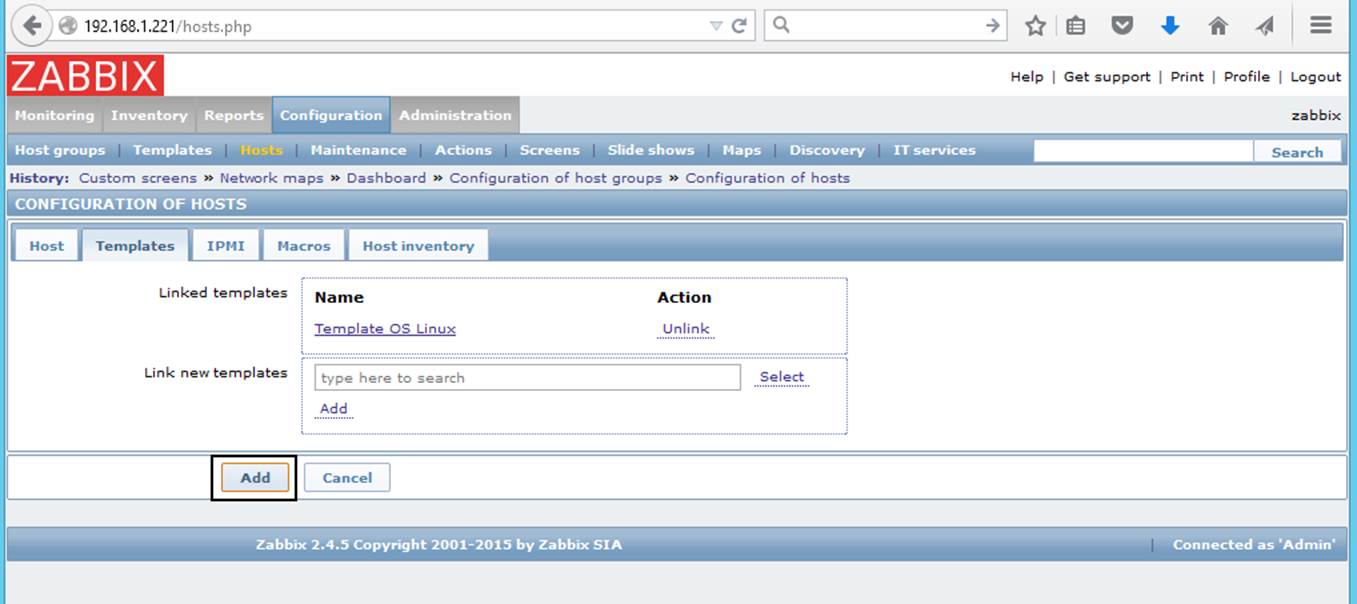
Select Linux OS Template8. Once the template appears to Link new template box, hit on Add text to link it to zabbix server, then hit on the lower Add button to finish the process and completely add the monitored host. The visible name of the monitored host should now appear hosts window.
Link New Linux OS Template
Add Linux OS Template
Added Linux Host to ZabbixThat’s all! Just assure that the host Status is set to Enabled and wait a few minutes in order for Zabbix server to contact the agent, process the received data and inform or eventually alert you if something goes bad on the monitored target.

0 comments:
Post a Comment