Here, we create scenario like this:
- First, we backup DNS zones using DNSCMD command line tool.
- Second ,we delete msserverpro.com DNS zones from server for creating the disaster.
- Finally, we restore msserverpro.com zone from a file created with DNSCMD command.
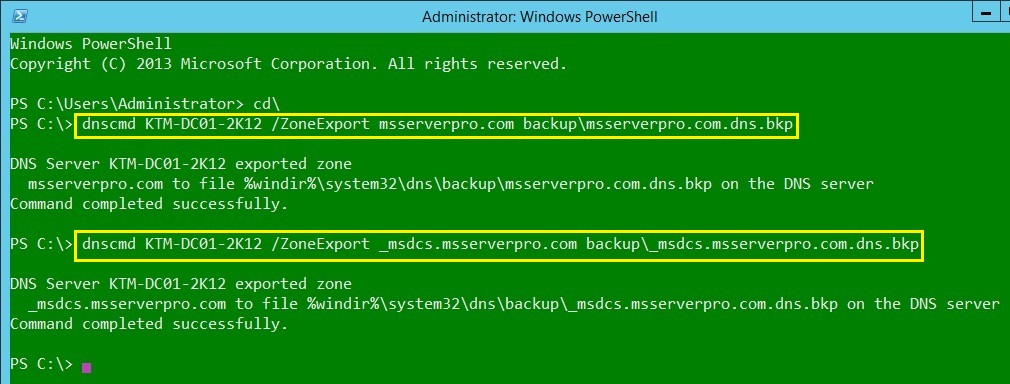
Take a backup of msservepro.com zone to a text file using DNSCMD command line tool:
1. Logon to Domain Controller, Open Windows PowerShell and type the following commands to backup DNS zones.

dnscmd KTM-DC01-2K12 /ZoneExport msserverpro.com backup\msserverpro.com.dns.bkp
dnscmd KTM-DC01-2K12 /ZoneExport _msdcs.msserverpro.com backup\_msdcs.msserverpro.com.dns.bkp
where KTM-DC01-2K12 is dnsserver name. The backup copy (text file) of the DNS Zone will be saved to
C:\Windows\System32\dns\backup folder
C:\Windows\System32\dns\backup folder
2. Open explorer and navigate to the C:\Windows\System32\dns\backup folder to verify its contents.

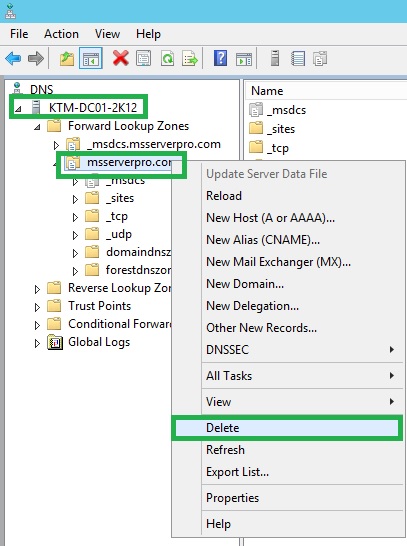
Deleting DNS zones from our server for disaster:
1. Open DNS Manager Console.
2. Expand the KTM-DC01-2K12 node, then expand Forward Lookup Zones, select the msserverpro.com zone, right Click and Click Delete.
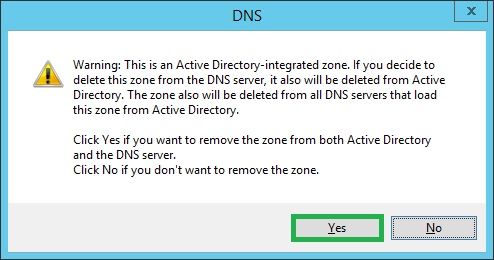
3. On the DNS dialog box, Click Yes twice to remove the zone from both Active Directory and the DNS Server.

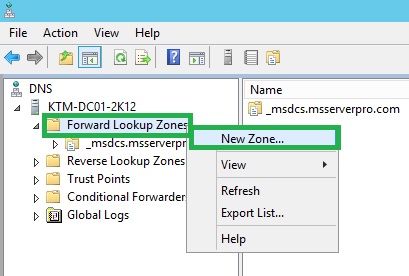
Use DNSCMD command line tool to restore the domain DNS zone:
1. Open DNS Manager Console.
2. Expand the Server, KTM-DC01-2K12, then right click Forward Lookup Zone and Click New Zone..
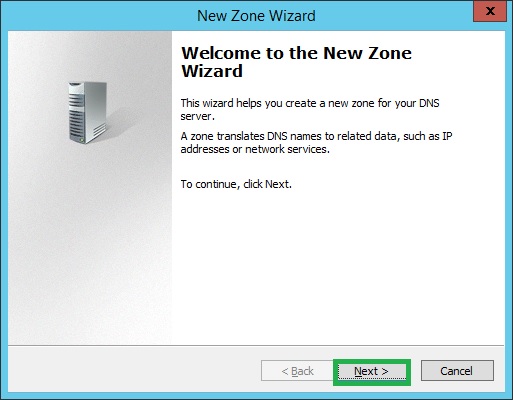
3. On the New Zone Wizard, Click Next.
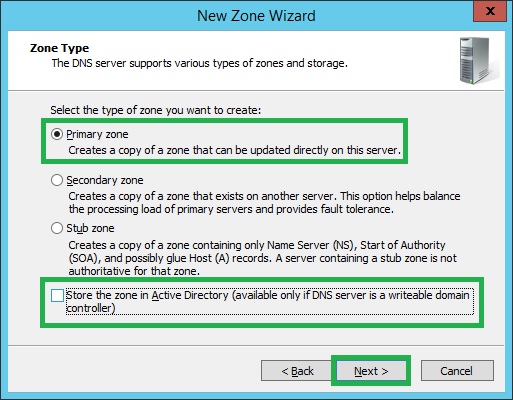
4. On the Zone Type Wizard, select Primary zone and Uncheck the Store the zone in Active Directory (available only if DNS server is a writeable domain controller)
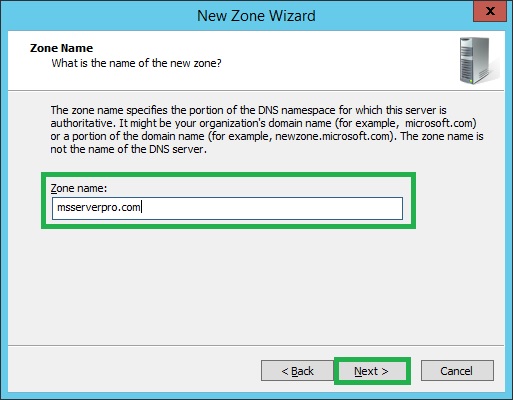
5. On the Zone Name Wizard, type the name of the zone being restored, msserverpro.com and click Next.
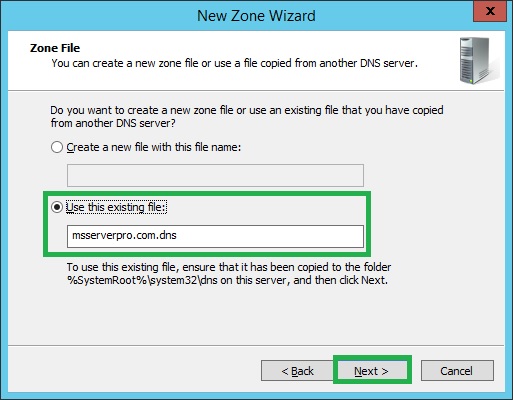
6. On the Zone File Wizard, select the option Use this existing file and Click Next.
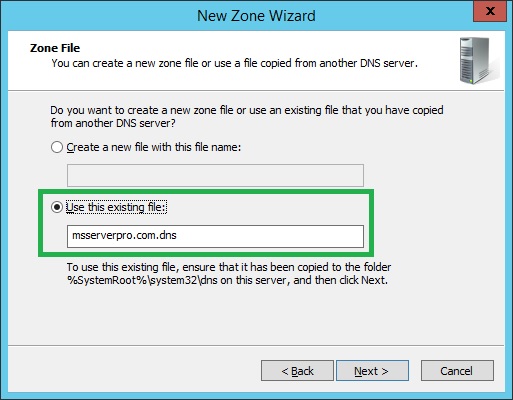
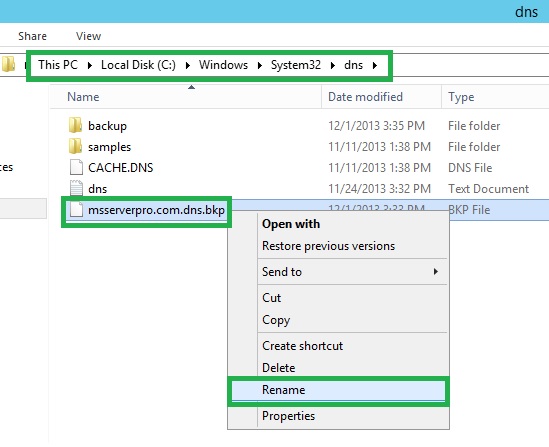
Make sure the current backup of the msservepro.com is present in the following path,C:\Windows\System32\dns\backup .

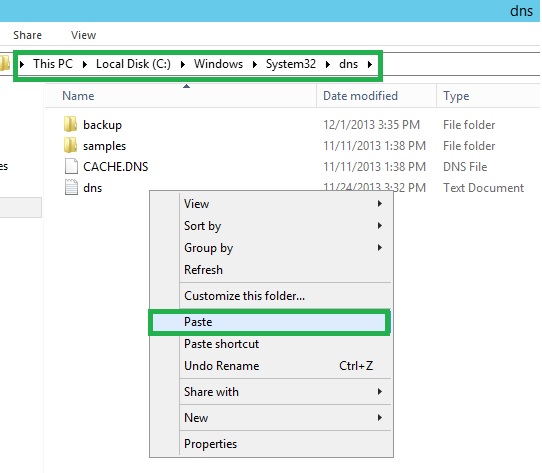
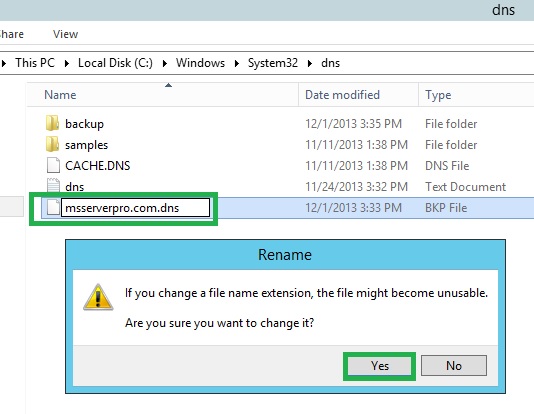
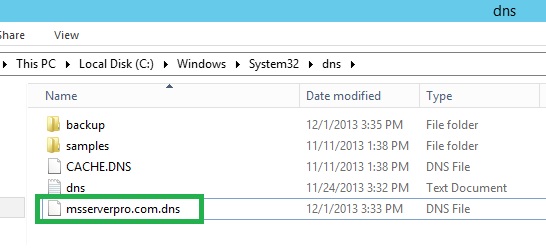
Copy the msserverpro.com.dns.bkp file to the parent folder (C:\Windows\System32\dns). Rename the file from msserverpro.com.dns.bkp to msserverpro.com (remove the .bkp extension). Click Yes.
7. Now go back to the Zone File Wizard, and click Next.
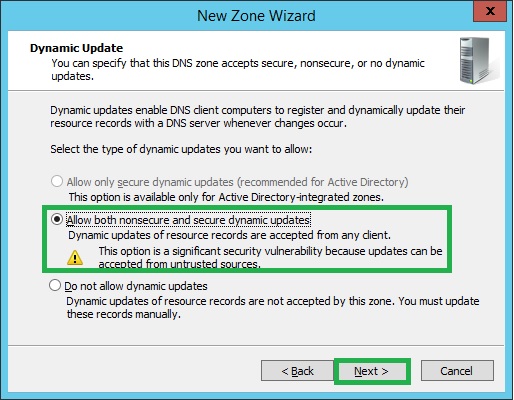
8. On the Dynamic Update wizard page, select Allow both nonsecure and secure dynamic updates and Click Next.
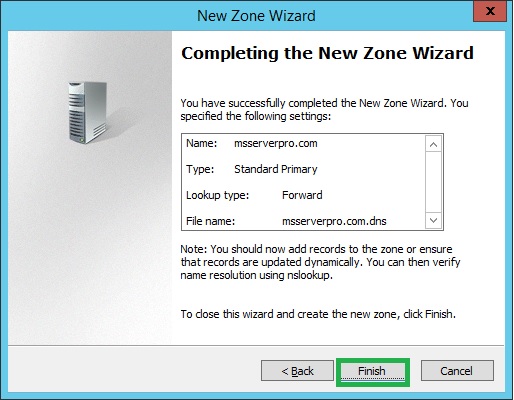
9. On the Completing the New Zone Wizard page, Click Finish.
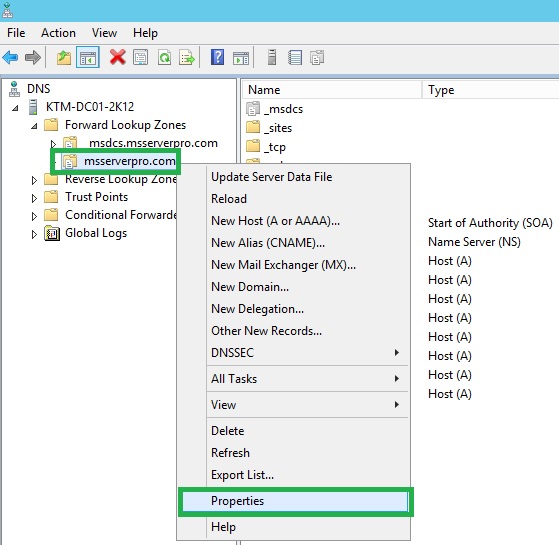
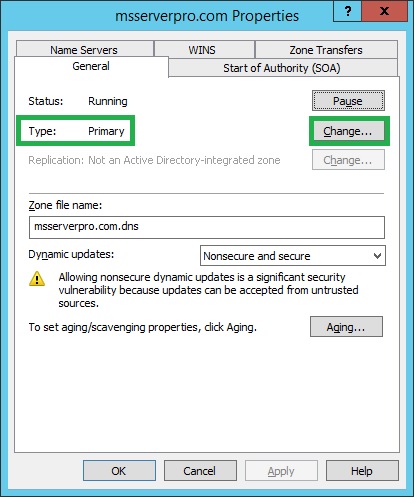
10. Make sure the msserverpro.com is created. Then right Click the msservepro.com zone and select Properties.
11. On the msserverpro.com Properties dialog page, Click the Change.. button at Type: Primary field.
12. On the Change Zone Type page, make sure Primary zone is selected and select the option Store the zone in Active Directory (available only if DNS server is a domain controller) and click OK.
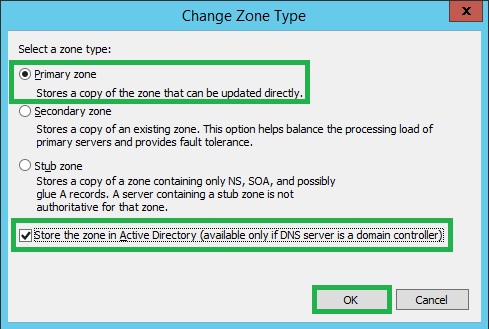
13. On the DNS dialog box, Click Yes to accept the change.

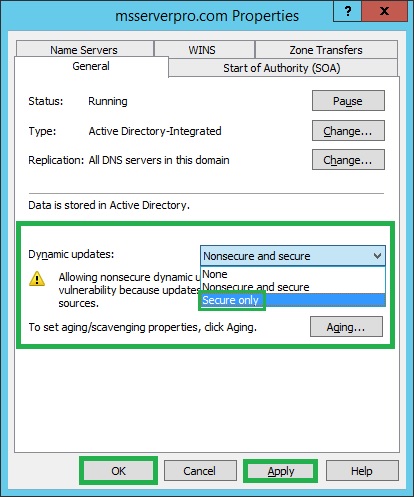
14. On the msserverpro.com zone Properties page, select Secure only at Dynamic updates field.
15. Finally, we should have our DNS Zone up and running..
Summary:
AD DS relies heavily on DNS name resolution. The above article outlines how to carry out DNS backup and recovery operations. I hope this can be largely beneficial to the users. It was my field experience during my career.
source: http://www.msserverpro.com/configuring-dns-backup-and-recovery-in-windows-server-2012-r2/
https://www.slideshare.net/laonap166/dns-backup-and-recovery-in-windows-server-2012-r2
0 comments:
Post a Comment